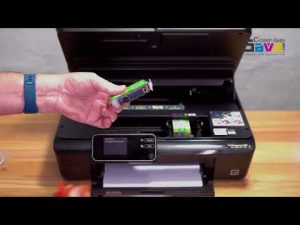
How to Replace Ink for an HP Photosmart 5510
| Jul 04, 2018
The HP Photosmart 5510 is a multi-function ink jet printer. It can be used to print, scan, and copy documents with its four separate ink cartridges, processing information quickly and efficiently to avoid being held up by any data jams. Here are some of the other great functions of this printer:
- can be connected to WiFi
- SD and memory stick slots
- eprint remote printing
- WPS automated quick wireless setup
- compact (occupies a minimum amount of space on your desk)
- intuitive touch screen with virtual buttons that are illuminated
Up next are some instructions for changing the ink cartridges for your Photosmart 5510.
Installing/Replacing Ink Cartridges
- If the product is off, press the Power button to turn on the printer and wait until the product is idle and silent before continuing.
- Open the cartridge access door and the carriage will move to the access area.
- Press the tab on the front of the cartridge inward to release it. Then, pull up on the cartridge to remove it from the slot.
- Remove the plastic wrap from a new cartridge by pulling the orange tab (make sure you remove the orange pull-tab and plastic wrap completely before you twist the orange cap in the next step, otherwise, ink might leak from the cartridge). When you remove the plastic wrap, the paper label on the top of the cartridge will tear slightly. This is necessary to vent the cartridge.
- Remove the orange cap from the cartridge.Twist the cap counter-clockwise until it snaps off.
- With the nozzle and the contacts facing down, push the cartridge into its slot.
- Press down on the cartridge until it is firmly set. Make sure the color icon on the cartridge label matches the color icon on the slot.
- Close the cartridge access door to complete the process.
If you need install other cartridges, all you need to do is repeat these steps.
Alignment Phase
After you have loaded your new cartridge(s) and closed the access door, the HP printer will automatically send you to the alignment phase to align the new cartridges. Follow the below instructions to align them:
- On the product control panel, press OK. The product will print an alignment page.
- Open the scanner lid and place the alignment page on the scanner glass with the printed side down, and then position it on the front right corner of the glass.
- Close the lid and press OK. The alignment page will then scan.
In the event the product does not automatically print an alignment page, follow these steps:
- From the home screen, press the right arrow and select the Setup icon.
- Select Tools.
- Press the down arrow and press Align Printer. The product should then print an alignment page. You can then continue with the previous steps for scanning the alignment page.
Once all of the steps to replacing the cartridges are completed, you are ready to use your printer.
