How to Clean Printhead: Automatic and Manual | Guide 2024
| Jul 04, 2024Unhappy with your print quality? Printhead issues may be the culprit. The printhead, responsible for precise ink delivery on paper, can get clogged, resulting in poor prints. But worry not! In this guide, we’ll explore easy steps on how to clean printhead using either the automatic printhead cleaning cycle or manual cleaning. Ensure top-notch print results every time!
In this guide, we will discuss:
- What Does a Printhead Look Like?
- Printhead Cleaning: Signs of a Clogged Printhead
- How to Clean Printhead: Easy Steps to Follow
- Clogged Printhead: Another Method to Try
What Does a Printhead Look Like?
A printhead usually looks like a small block with tiny openings. It’s a crucial part of printers that puts ink on the paper. The appearance can vary based on the type and model of the printer.
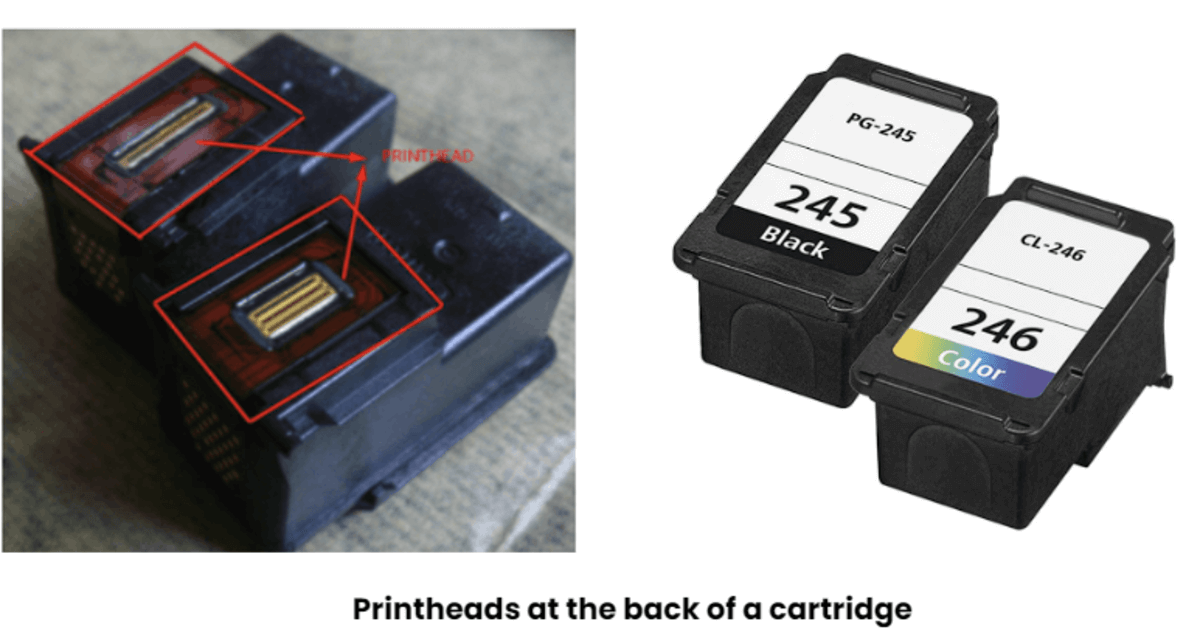
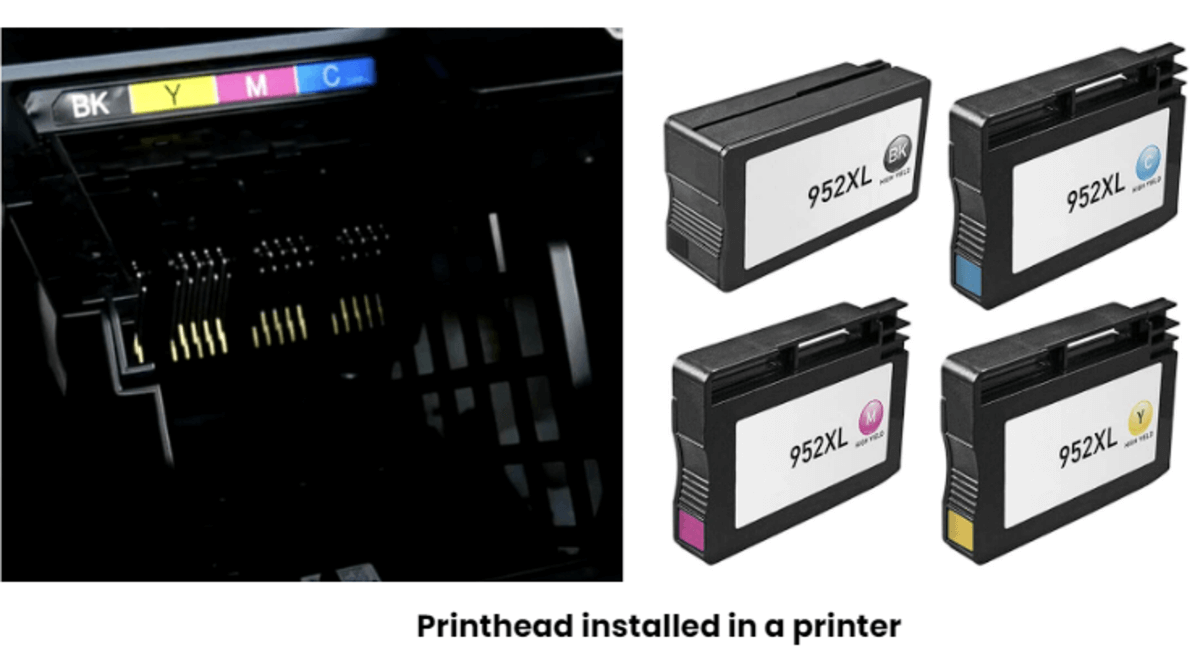
Black and tri-color cartridges that are box-types, such as HP 61 to 67 series and Canon 245, 246 series, have built-in printheads. Most individual rectangular ink cartridges, like the HP 952 series and Epson 252, don’t have built-in printheads. You can find the printhead once you uninstall all the ink cartridges. Remove the cartridge carrier, then flip it over to see the printhead nozzles at the back. See the examples below:
Ink Cartridges with Integrated Printhead
Ink Cartridges Without Integrated Printhead
Printhead Cleaning: Signs of a Clogged Printhead
Are you ready to unclog your printhead? But before we know how to clean printhead, let’s check out a few signs that might tell you if your printhead is clogged. Some things to look for include:
1. Poor Image Quality
A clogged printhead can mess up how your images look. They might seem distorted, blurry, or lacking detail because the ink isn’t spreading right due to the blockage. This can be bad if you want to print vibrant photos at home.
2. Print Gaps and Lines
Clogs in the printhead can make gaps or lines in your prints. This is because the ink isn’t spreading properly across the page, leaving empty spaces or lines.
3. Ink Smudges
If you see streaks or ink marks on your prints that shouldn’t be there, it might be a sign of a clogged printhead. The blockage makes extra ink build-up, creating marks on the paper.
4. Printing Takes Too Long
If your printer is slower than usual, it might be because the printhead is clogged and might need printhead cleaning. The blockage makes the ink struggle through the nozzles, slowing the printing.
5. Strange Noises When Printing
Hearing weird sounds like clicks or whirrs while your printer works could mean the printhead is clogged. The blockage makes the printer work harder, causing unusual sounds.
That’s why knowing how to clean your printer heads is essential to get the best out of your printer and cartridges. So, let’s check out the steps below on how to unclog a printhead.
How to Clean Printhead: Easy Steps to Follow
Now that we know the common indicators of a clogged printhead let’s explore printhead cleaning methods. You have two options: using your printer’s software for cleaning or doing it manually. You can watch the video or follow the steps below on how to clean printer heads and achieve flawless prints!
How to Run Printer Cleaning Cycle?
You can run a printhead cleaning cycle regardless if you have a cartridge-integrated printhead or a printer-integrated printhead. However, please keep in mind that the printhead cleaning cycle uses a lot of ink. So, an automatic printhead cleaning cycle is not recommended if your printer cartridges run low on ink, as this method might damage your printer. Here’s how to clean a printhead automatically:
STEP 1: Check your printer’s display menu.
STEP 2: Select “Printer Maintenance,” then choose the “Clean Printhead” function.
STEP 3: Once done, you can do a test print to check if it works.
STEP 4: If the printouts are still bad, unplug your printer, then remove the cartridges. Clean the cartridges’ contacts with a dry, clean cloth. (This step is applicable for cartridges with integrated printheads.)
STEP 5: Plug in your printer. Allow the printer to start up and complete the automated setup process.
STEP 6: Print another test page. You can do it a few times to achieve the desired printout results.
If the printhead cleaning cycle doesn’t help, try cleaning it manually. Remember that printhead locations vary between printers, either on the cartridge or inside the printer. For ink bottles, a printhead cycle should be sufficient.
How to Manually Clean Print Head?
If your cartridge has a built-in printhead, you can clean it manually by following these simple steps:
STEP 1: Prepare a damp paper towel and a dry paper towel. Use gloves to protect your hands from the ink.
STEP 2: Remove the ink from the printer. To prevent damaging the ink cartridge, avoid touching the nozzle or circuitry.
STEP 3: Place your ink cartridge face down on the damp paper towel, then tap it several times to shake the ink inside.
STEP 4: Slide the ink cartridge gently from the top of the paper towel to the bottom. Do it several times until all the colors of your tri-color ink cartridge are visible: cyan, magenta, and yellow.
STEP 5: Use the dry paper towel to blot the ink cartridge gently after cleaning it with the damp towel. Be gentle and ensure that all moisture is removed.
STEP 6: Reinsert the ink cartridge into the printer and print a test page to ensure the printhead works properly.
Clogged Printhead: Another Method to Try
When you have a clogged printhead, you can also try using water to clean it. This can be useful if the two methods to clean the printhead mentioned above don’t work. Here’s a simple guide to how you can do it:
STEP 1: Prepare a dry paper towel in a plastic container, folded into quarters.
STEP 2: Pour roughly two inches of distilled warm water over the paper towel, submerging it. You can also use 50% isopropyl alcohol and 50% distilled water.
STEP 3: Uninstall all the ink cartridges from your printer. Place the cartridges on a paper towel. Ensure that it is facing upwards.
STEP 4: Remove the cartridge carrier or the printhead from the printer.
STEP 5: Dip a microfiber cloth in the distilled warm water to clean the clogged printer nozzles.
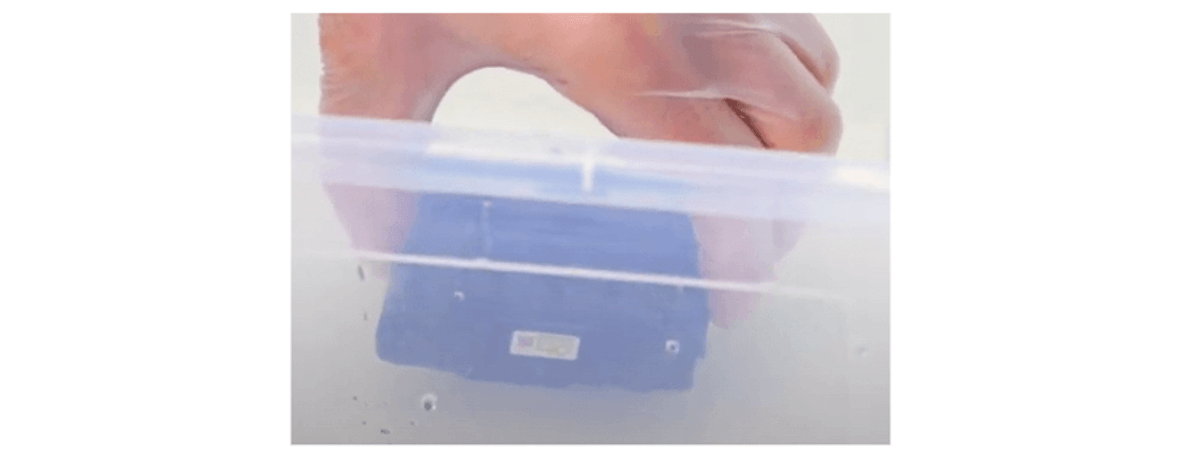
STEP 6: Submerge the printhead in the container with water for 10 minutes. Make sure the nozzles are at the bottom.
STEP 7: Dry the printhead on a paper towel with the nozzles up. Make sure not to touch the nozzles to avoid damaging them.
STEP 8: When the printhead is dry, reinstall it on your machine. Ensure that the latch is secure.
STEP 9: Insert the ink cartridges back, then do a test print to confirm if the printhead problem is fixed.
Once your test print is clear and fine, it means you successfully resolved your clogged printhead problem. But if all else fails, calling a technician to help you with printhead cleaning is best.
Parting Words
That’s it! You can now unclog your printhead by cleaning manually or running a printhead cleaning cycle. Just follow the simple steps outlined in this guide on how to clean printhead to ensure that your prints stay clear and sharp. Say goodbye to printing issues!
Key takeaways:
- Look for signs like poor image quality, print gaps, ink smudges, slow printing, and strange noises. These could indicate a clogged printhead affecting your prints.
- You can clean your printhead by running a printer cleaning cycle or doing it manually. Both methods ensure optimal print quality and help you tackle printhead clogs effectively.
- Be mindful of ink usage when using the printer’s cleaning cycle. Avoid running the cycle if ink cartridges are low to prevent potential damage to your printer.
If you need extra assistance with your ink order, feel free to contact our customer service team. Call us toll-free at 1-833-465-6888, Monday to Friday, from 6 am to 4 pm PT. We’re here to ensure your printing experience is a joyful one!
Frequently Asked Questions
1. How often should I clean my printhead?
Cleaning your printhead depends on your printer usage. Cleaning it every few weeks is a good idea if you print regularly. For occasional users, cleaning it once a month should be enough. Keep an eye on print quality – if you see issues, it might be time for cleaning. Always check your printer manual for specific recommendations on printhead maintenance, or follow this guide to clean your printhead. Regular cleaning helps ensure clear and crisp prints.
2. Is it safe to manually clean the printhead with isopropyl alcohol?
Yes, it is generally safe to use isopropyl alcohol for manual printhead cleaning. Start by checking your printer manual to ensure it’s recommended for your model. Use a small amount of alcohol on a soft cloth to gently clean the printhead. Avoid touching other printer parts, and let the printhead dry completely before reinserting it.
3. What should I do if the automatic printhead cleaning cycle doesn’t work?
If the automatic printhead cleaning cycle doesn’t work, don’t worry. First, double-check that you followed the cleaning instructions correctly. If the problem persists, try running the cleaning cycle several times. If that doesn’t help, consider manually cleaning the printhead following the printer manual’s guidance, or you can check the steps in this guide.
4. Why are there still print quality issues after cleaning the printhead?
Print quality issues may persist after cleaning the printhead for a few reasons. Firstly, ensure you followed the cleaning steps correctly; any missed spots could cause problems. Secondly, check if your ink cartridges are old or low on ink, as this can affect print quality. If the issue continues, there might be a deeper problem with the printhead or other printer parts. Consider seeking professional assistance or consulting the printer manufacturer’s customer support for more specific guidance. Regular maintenance is vital to preventing print quality issues in the future.
5. Should I clean the printhead if I haven’t used my printer for a while?
Yes, if you haven’t used your printer for a while, it’s a good idea to clean the printhead. Printers that sit unused can develop dried ink, leading to potential clogs. Cleaning prevents these issues and ensures your printer works smoothly when you use it again. You can follow the steps in this guide to clean your printhead successfully. Regular maintenance, especially after inactivity, helps maintain optimal print quality.
Related Articles
How to Store Printer Ink Cartridges?


